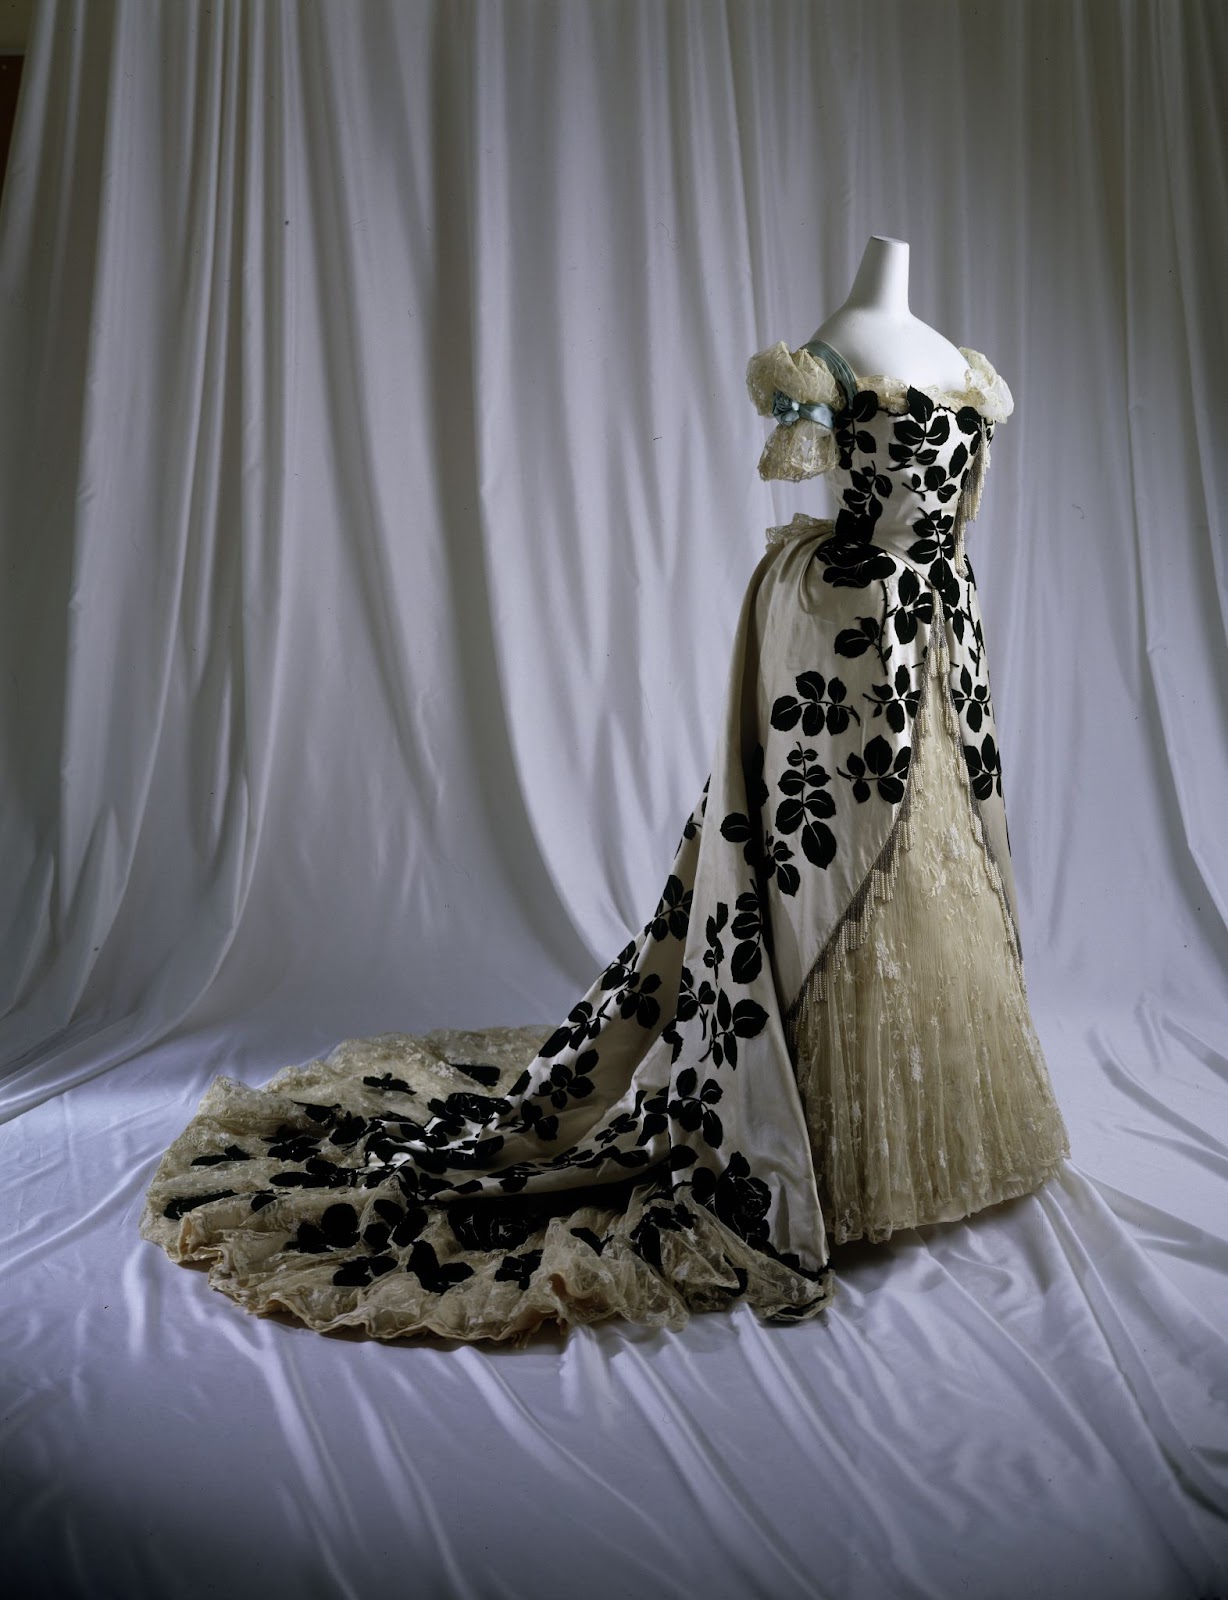
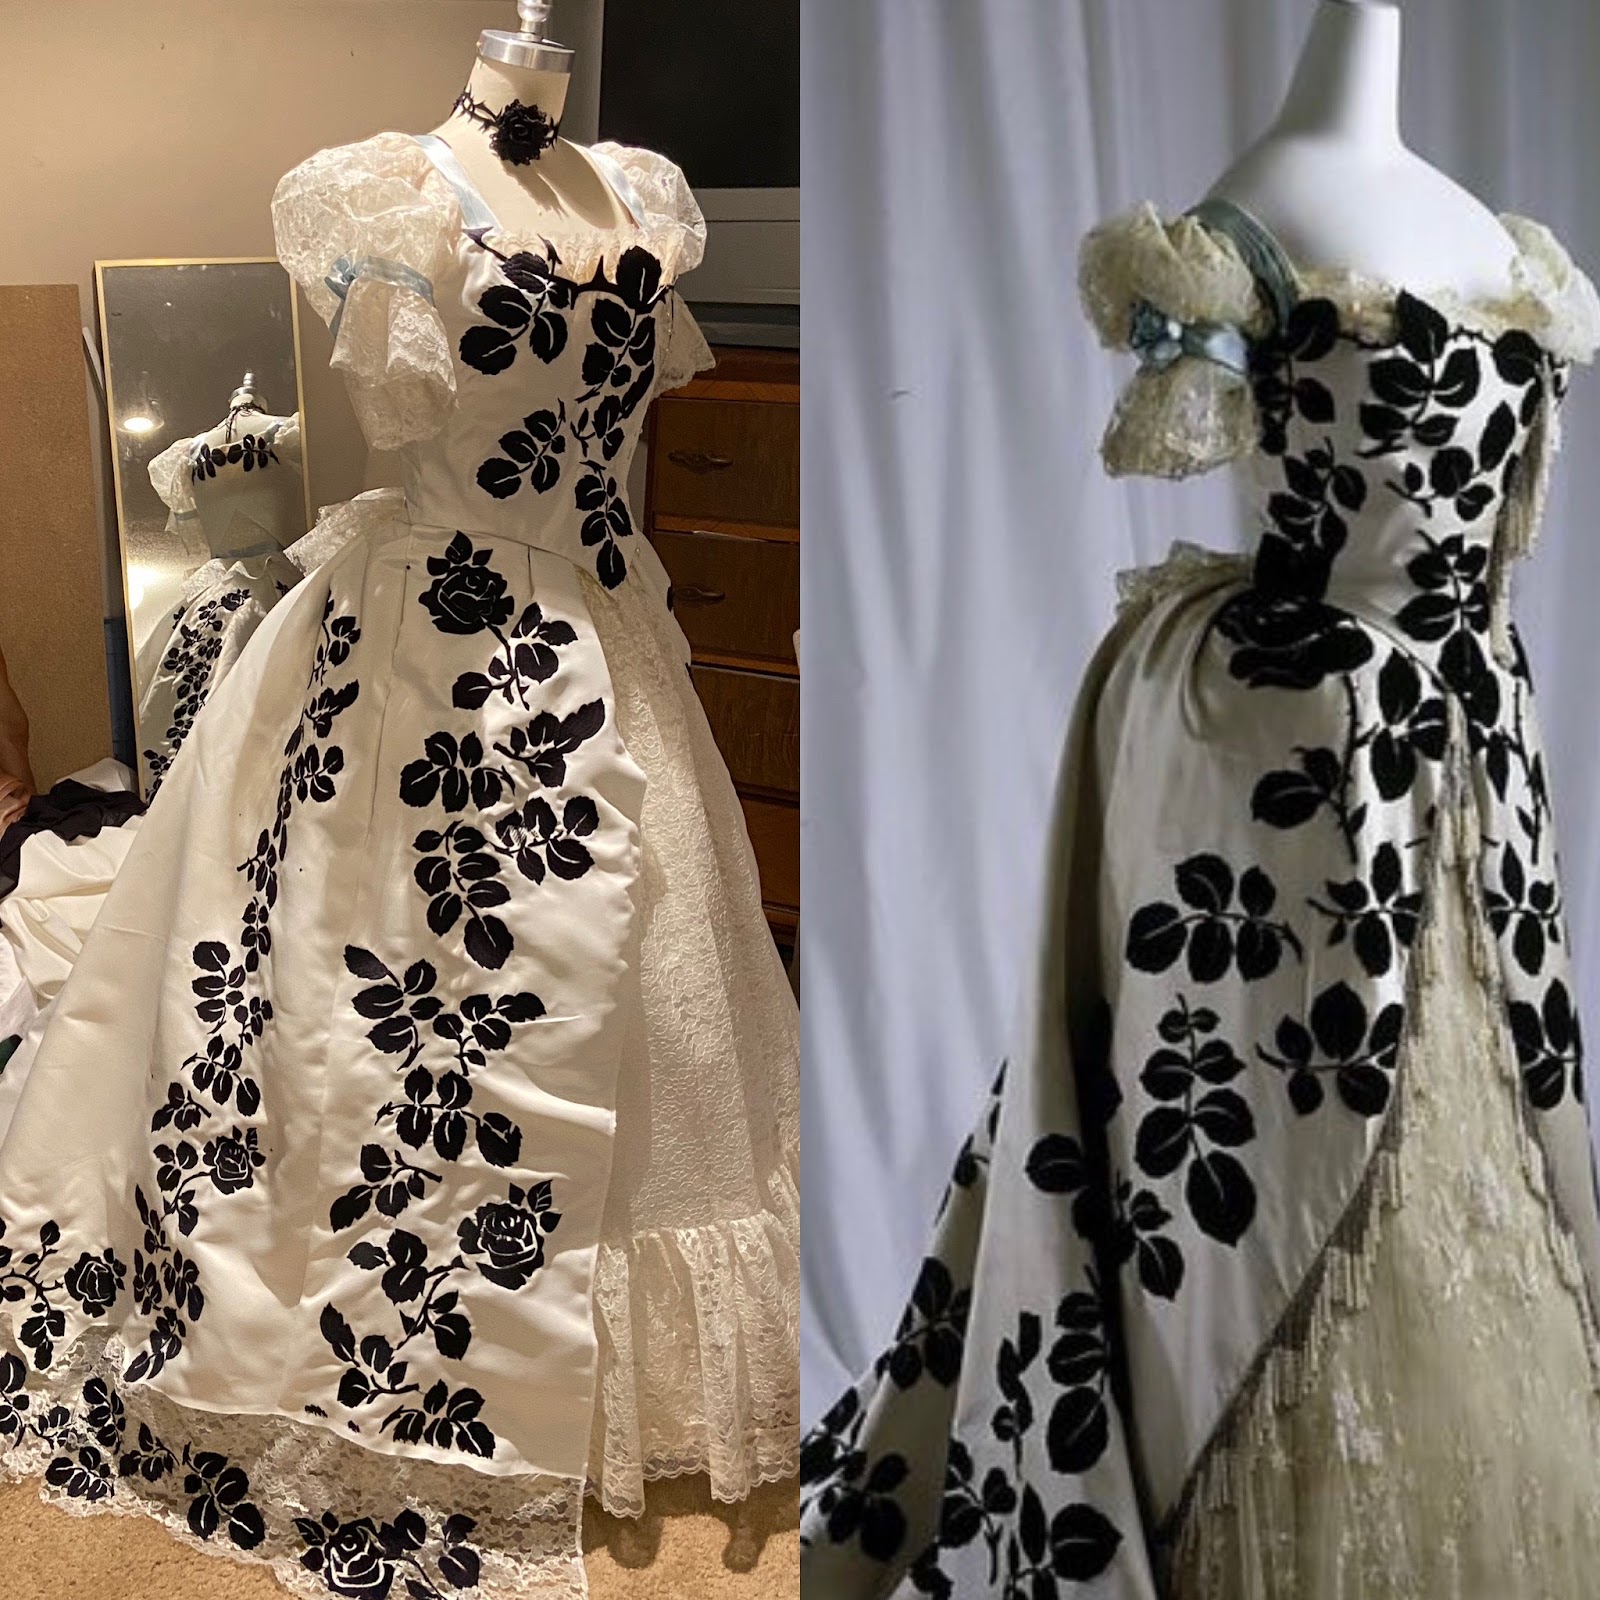
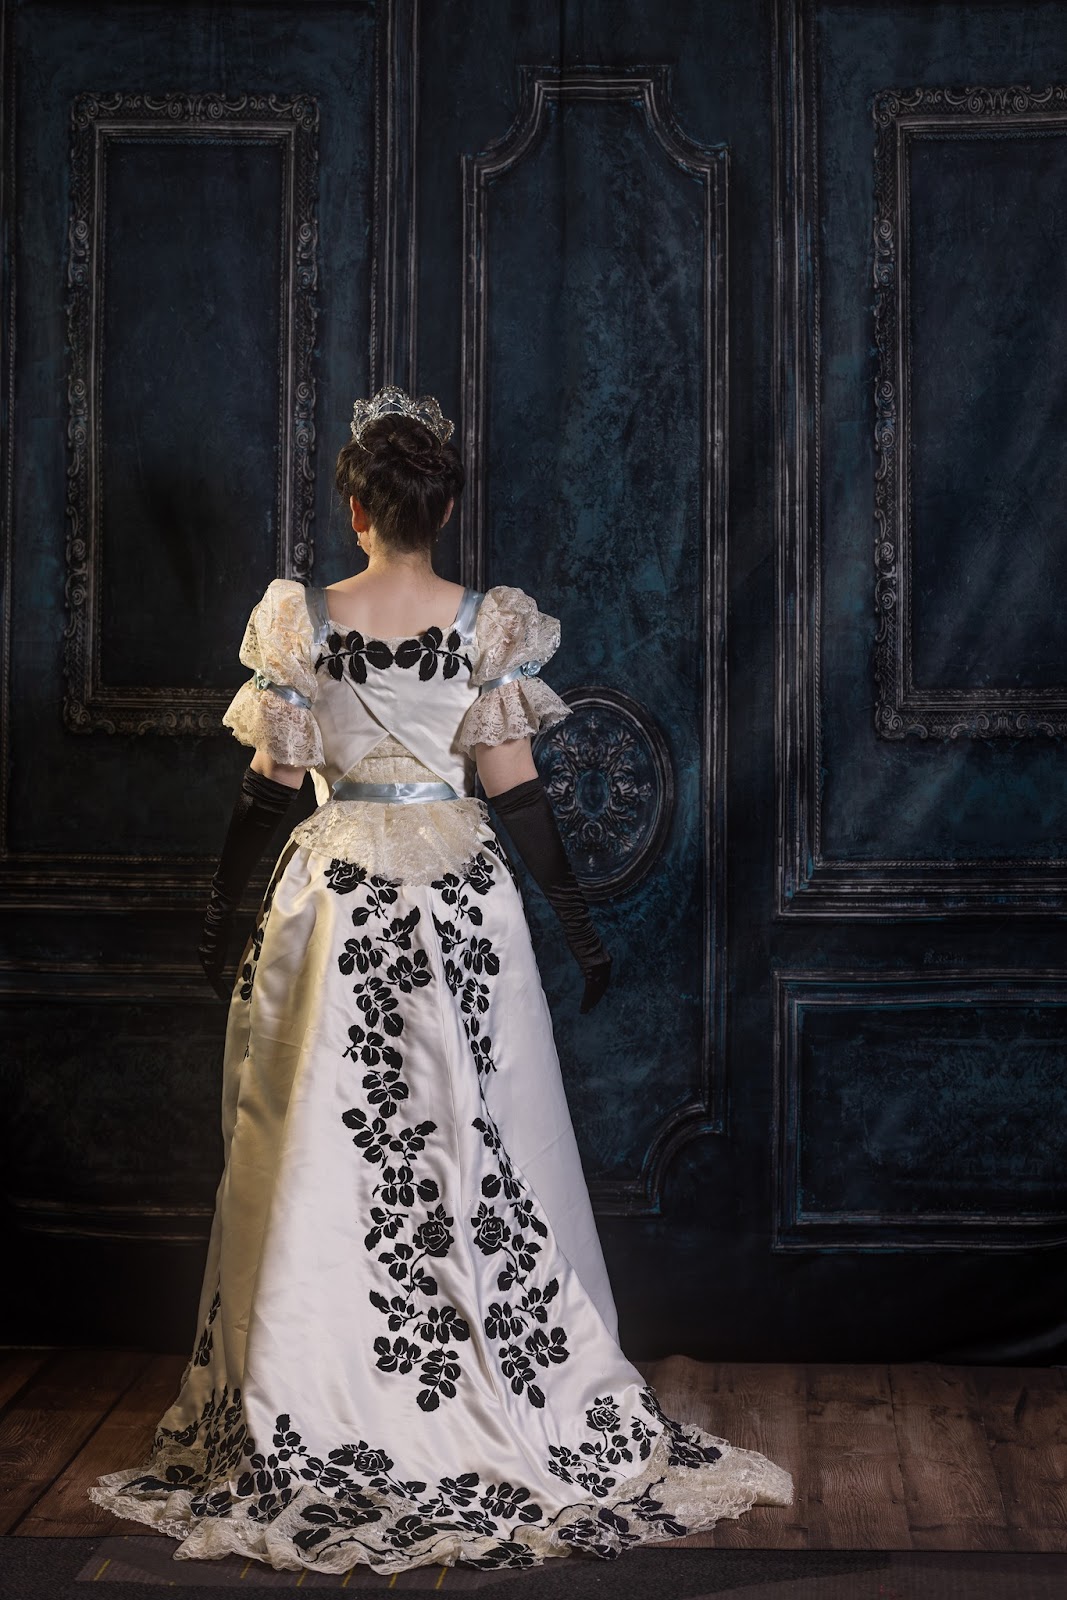
This Jean Philippe Worth gown held by the MET has always fascinated me. The off-center motif of roses is so striking on the ivory satin. The choice to have the vast majority of the design be the leaves instead of the rose blooms is so odd and clever. Like many other Worth gowns of this period (est. 1900), the bodice has been draped over a structural underbodice. Unlike many others available to research, this gown seems to be a re-trimming of a previously finished gown, adding the brilliant satin overskirt and wrapping a bit of the fabric across the bodice with little thought to a close fit at the bust or waist.
Stage 1: The research
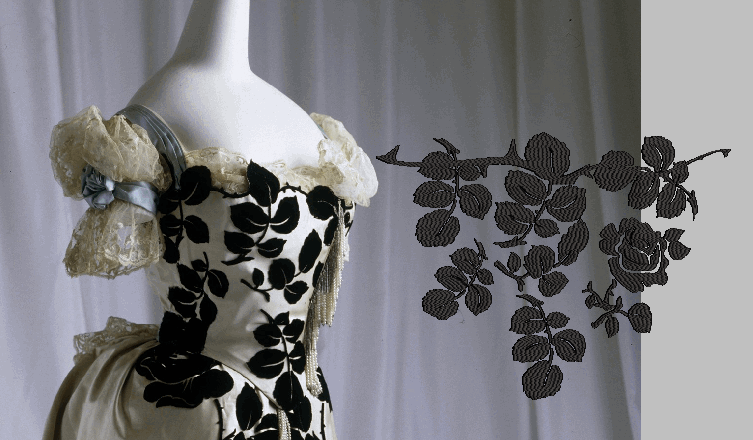
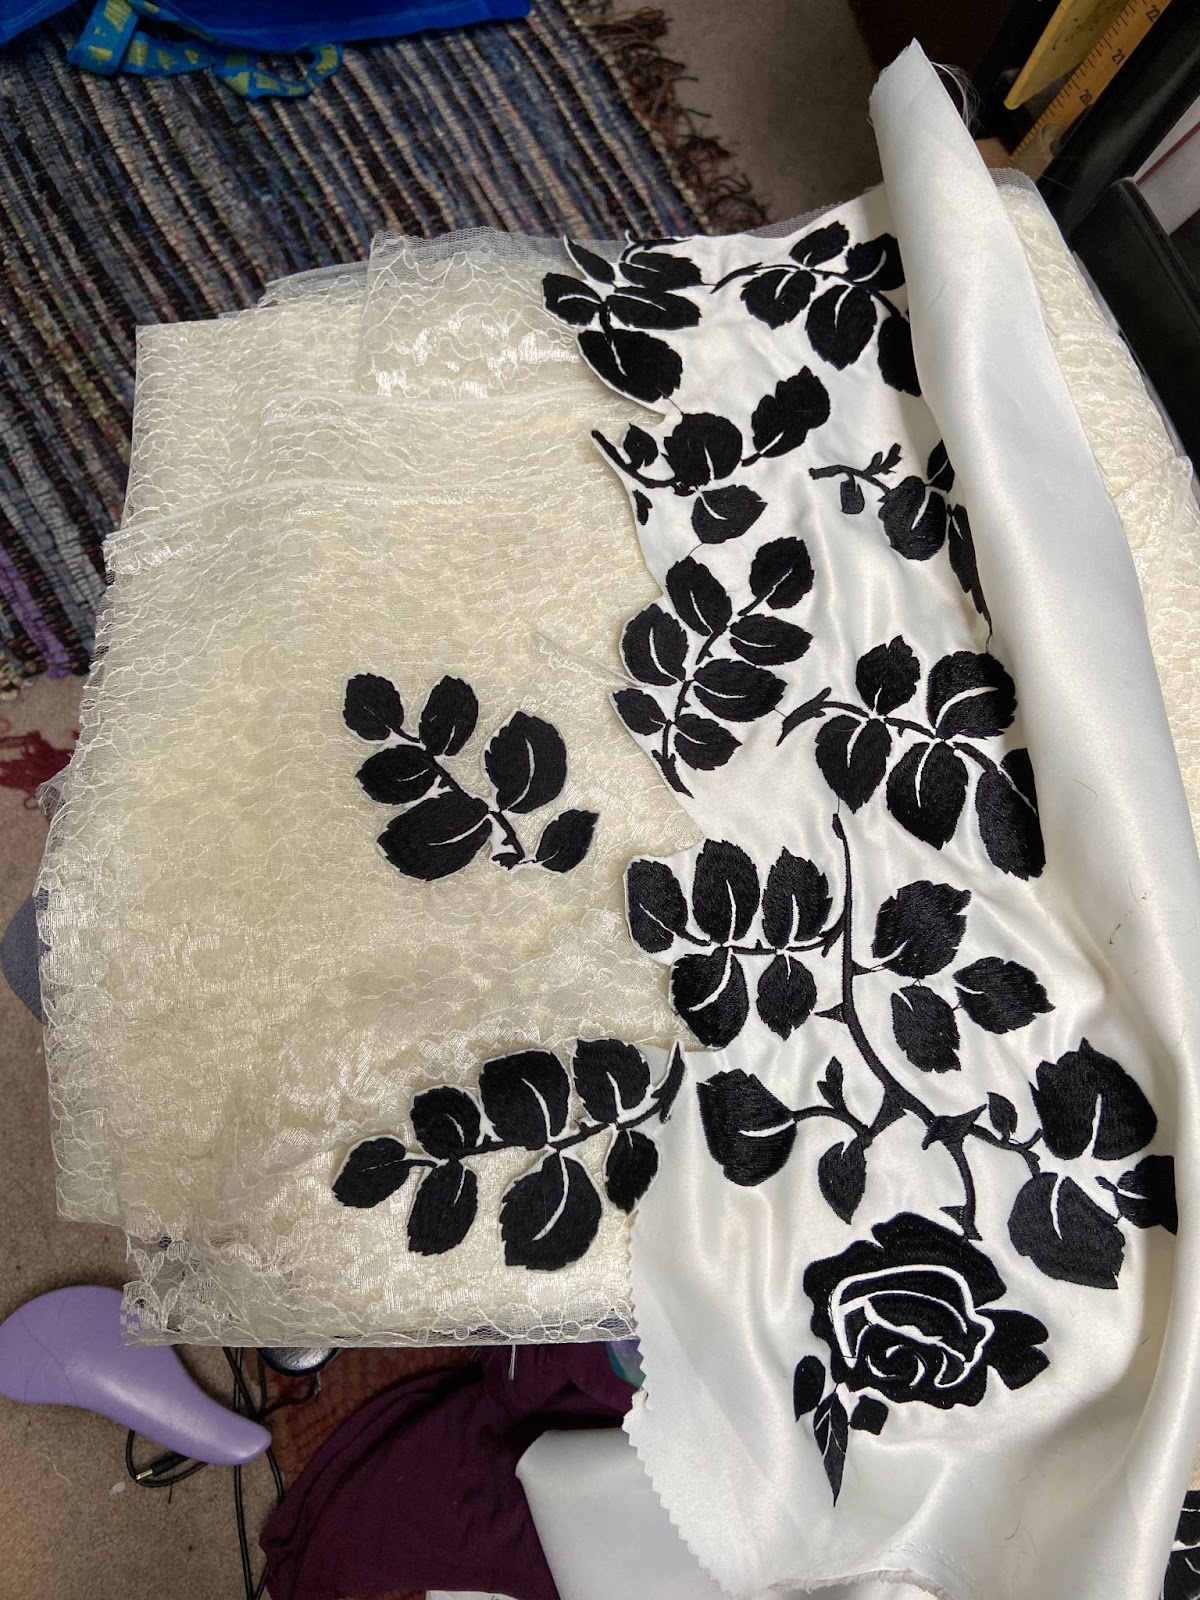
How on earth are those roses done? The answer is that the black roses were woven into the fabric with some sort of velvet finish. Velvet applique seemed the best way to replicate the effect. For the design, I digitized the roses by tracing to get it as close as I could using Hatch embroidery software. Over 25 versions, so many samples. Thread testing was next because embroidery thread is designed to be shiny. Interestingly, serger thread was the best choice for a matte embroidery finish.
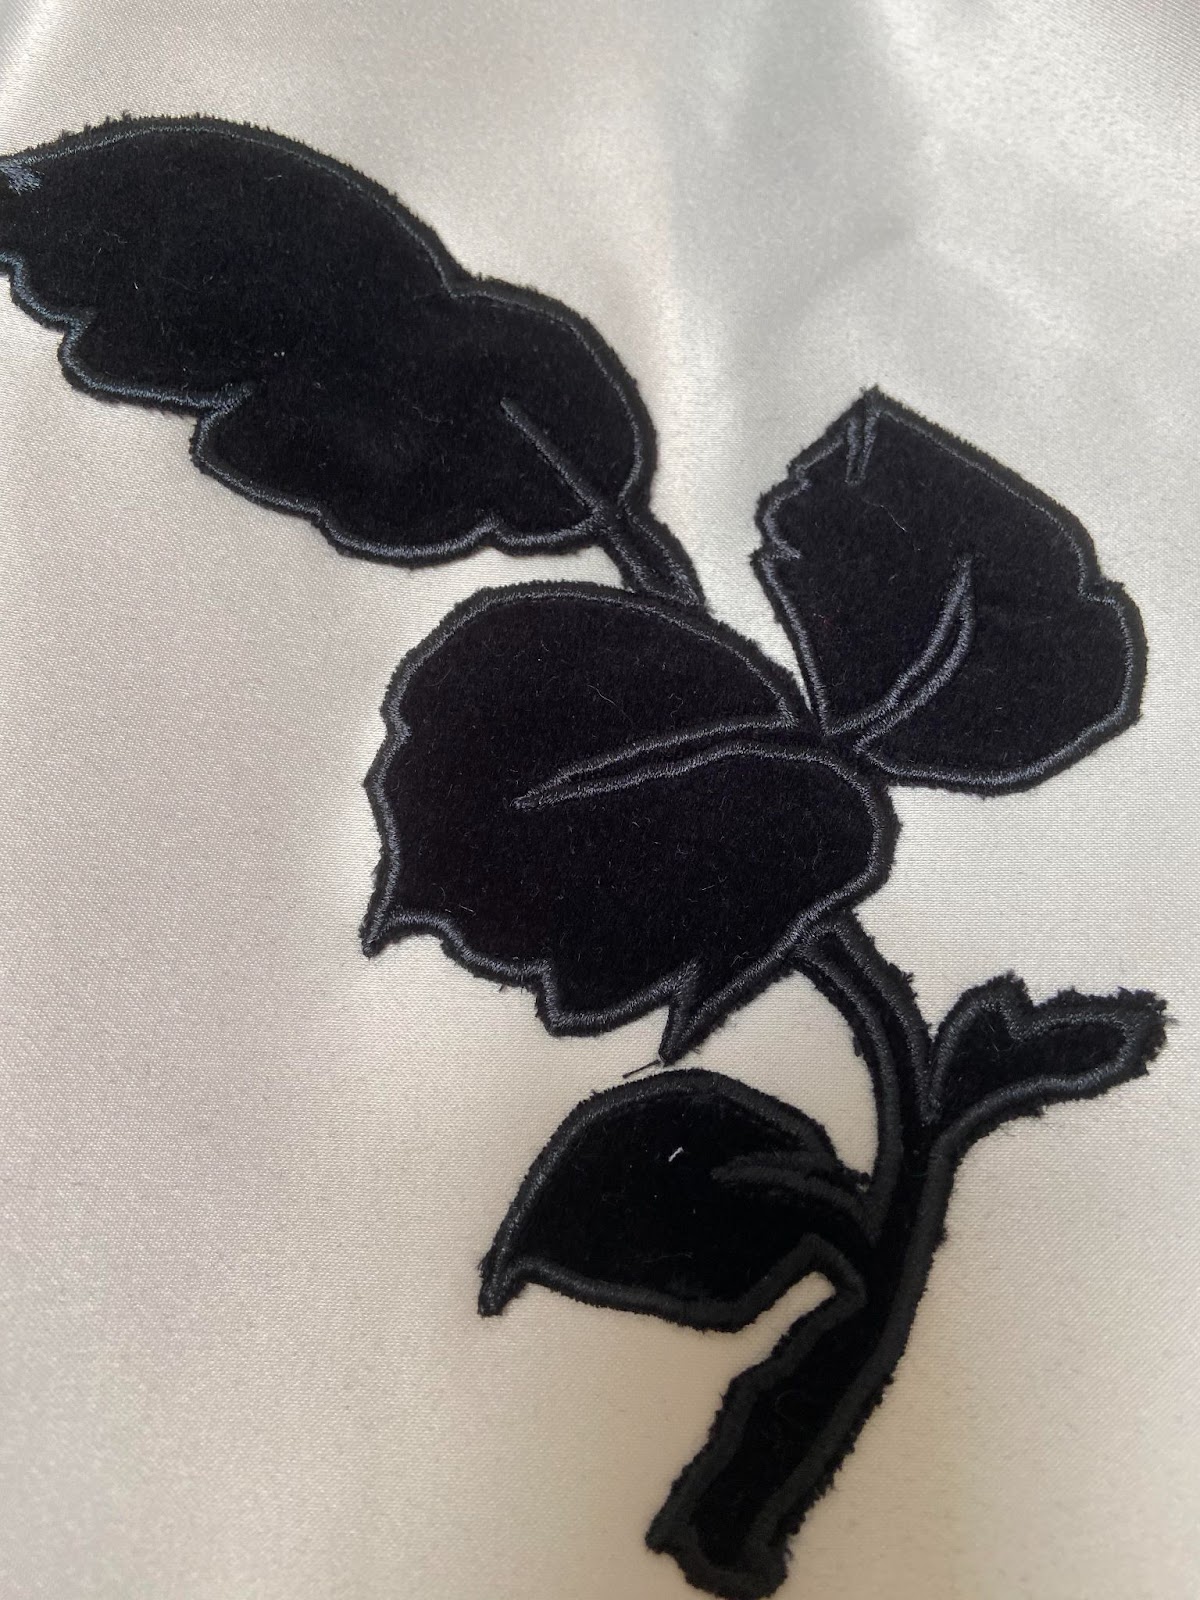
My try at using the velvet as applique was a good one, but I lacked the skill to build the design en masse. I would have needed to trim back the velvet while the satin was still on the hoop without shifting the satin on the hoop even the slightest bit. I think my chances of being able to do that reliably, with 8 hoopings down each panel, were slim at best. The fuzzy edge left behind when I trimmed the velvet away after the embroidery (shown above on the left) was lackluster.
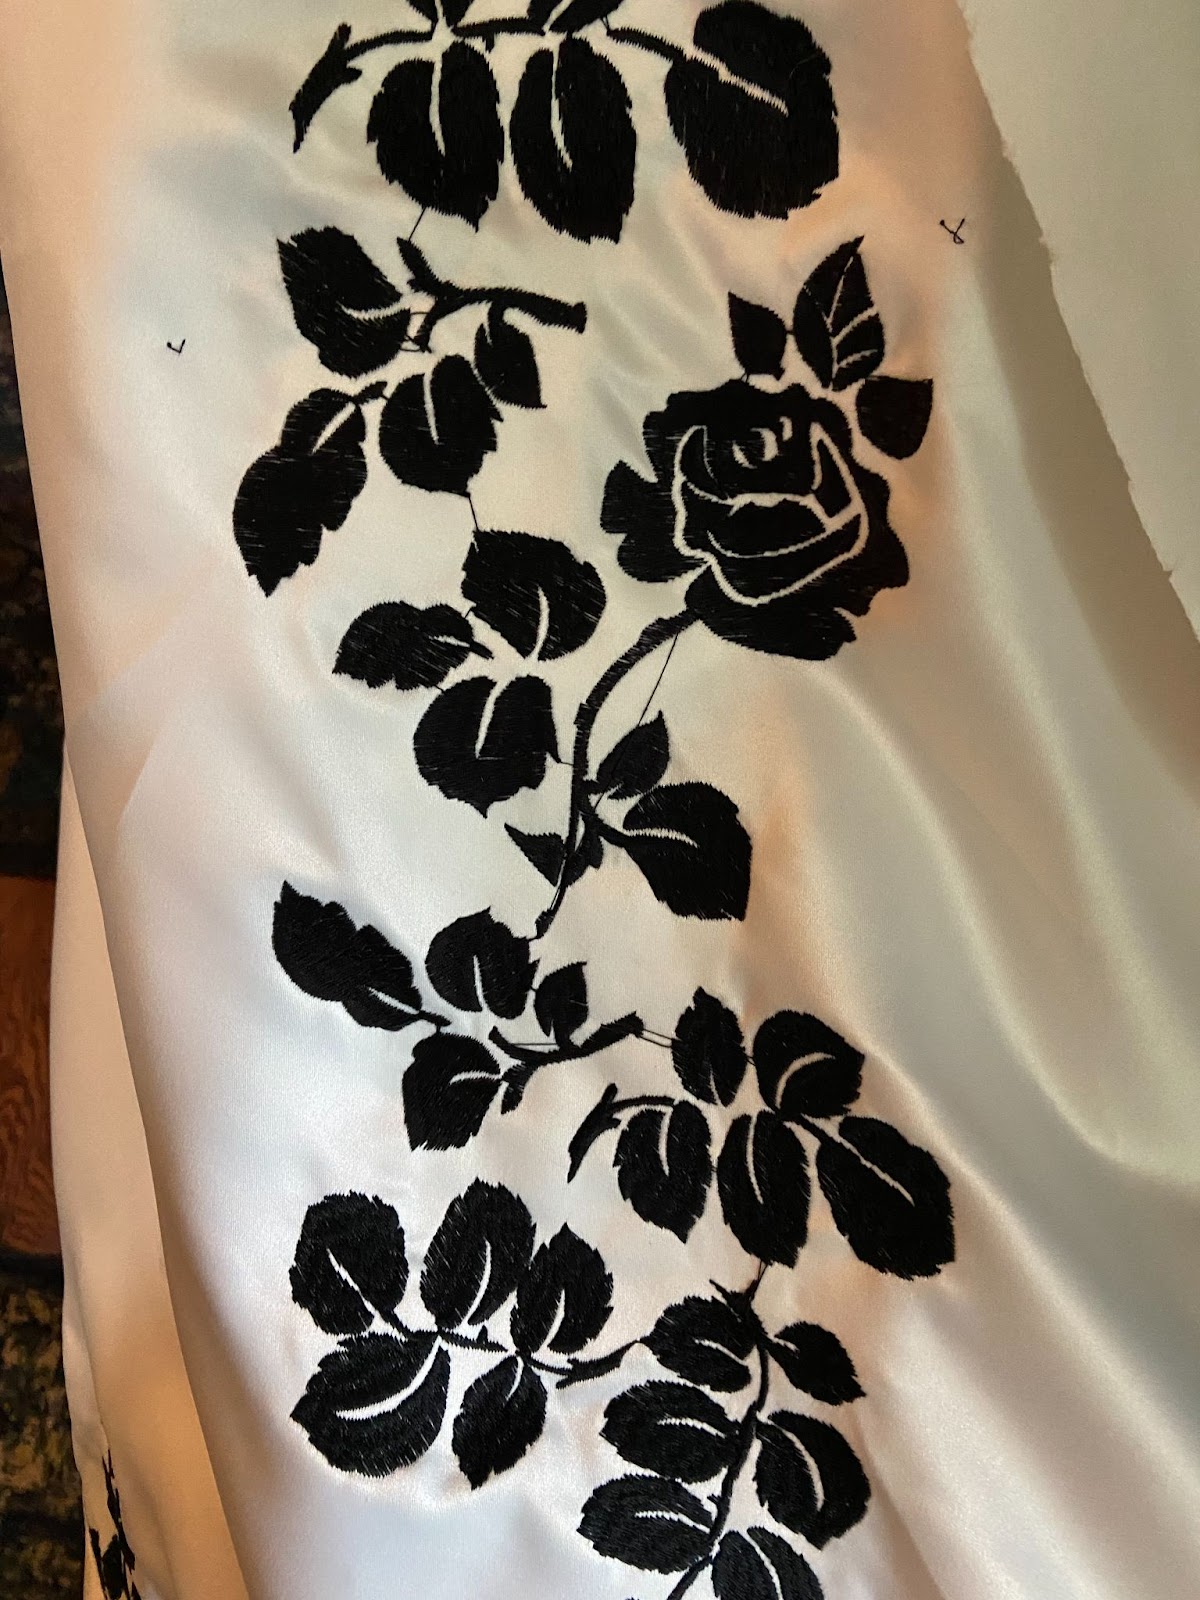
So, embroidery in solid (upper right) was the solid choice. Next was fighting the puckering. Anyone who has tried machine embroidery on satin will feel my pain here. I spent a couple of weeks trying different backings, stitch densities, and threads before I got to the slightly less puckery of the final dress. The puckering still makes me upset. I think if I were to do it again, I would cut and iron-on the motifs, then zigzag all of the edges. That sounds even more grueling.
Embroidery:
The embroidering took about 2 hours for every 10-12” long piece, with 8 pieces per each of the 8 full rose panels. The finished dress is version three of the skirt, as getting the angle of the panels on the fabric and the size of the roses was a difficult process, too. Interestingly there are only 3 photographs of this gown that I could find, and none of them show the left side. My pet theory is that there is a coffee stain on the left side of the original.Wanna proof me wrong? Great! Show me a photo of the left!
In the photo above, you can see my digitization for the front.
The embroidery on the lace for the skirt hem was by far the most challenging. The backing kept getting sucked into my machine. After trying two different machines and even more options for the backing on the embroidery, I had just enough random roses and leaves to finish the bottom of the skirt to a good enough state. Quite a lot of hand embroidery was needed as well, as there were a few places where my embroidery machine errored and many more areas where I needed to smooth the design piecing. The design is pieced to use as few panels as possible (8) and that meant breaking the design halfway through leaves, etc. Needing to get three panels done right onto each of the back skirt panels was just a bit past my skill level, but I got it done.
Construction:
Beaded Fringe? Light blue ribbon? Roses that continue onto the lace of the gown? There are lots of extra details to try to get right.
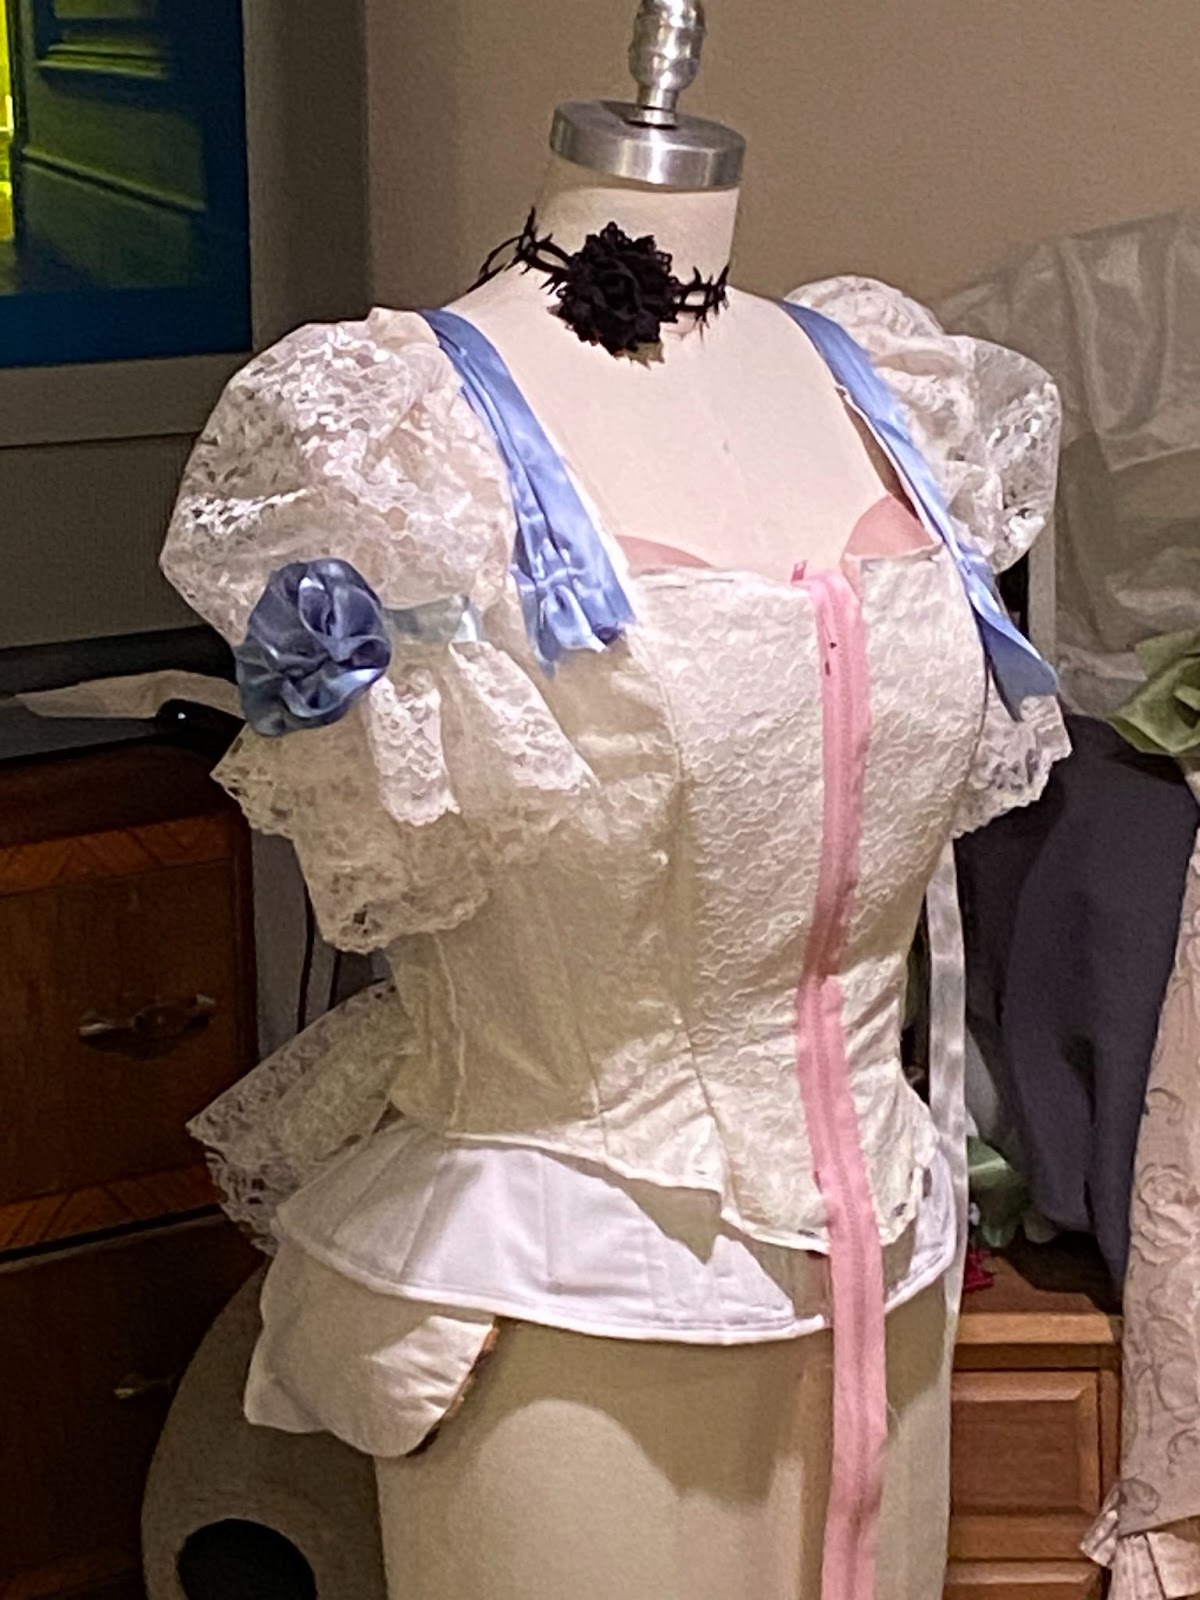
Here is the base gown in progress. From how the satin fabric is draped, it appears to be just laid over a finished gown. The bodice is patterned using a wrapped tape method over the corset designed to be worn underneath for a good fit. The light blue ribbon I used originally on the bodice was too dark a blue, so a lighter blue vintage ribbon was found and works better. On the right, above is the finished dress, ready for the overlay. The front does close with a zipper, though the final one is the right length and color.
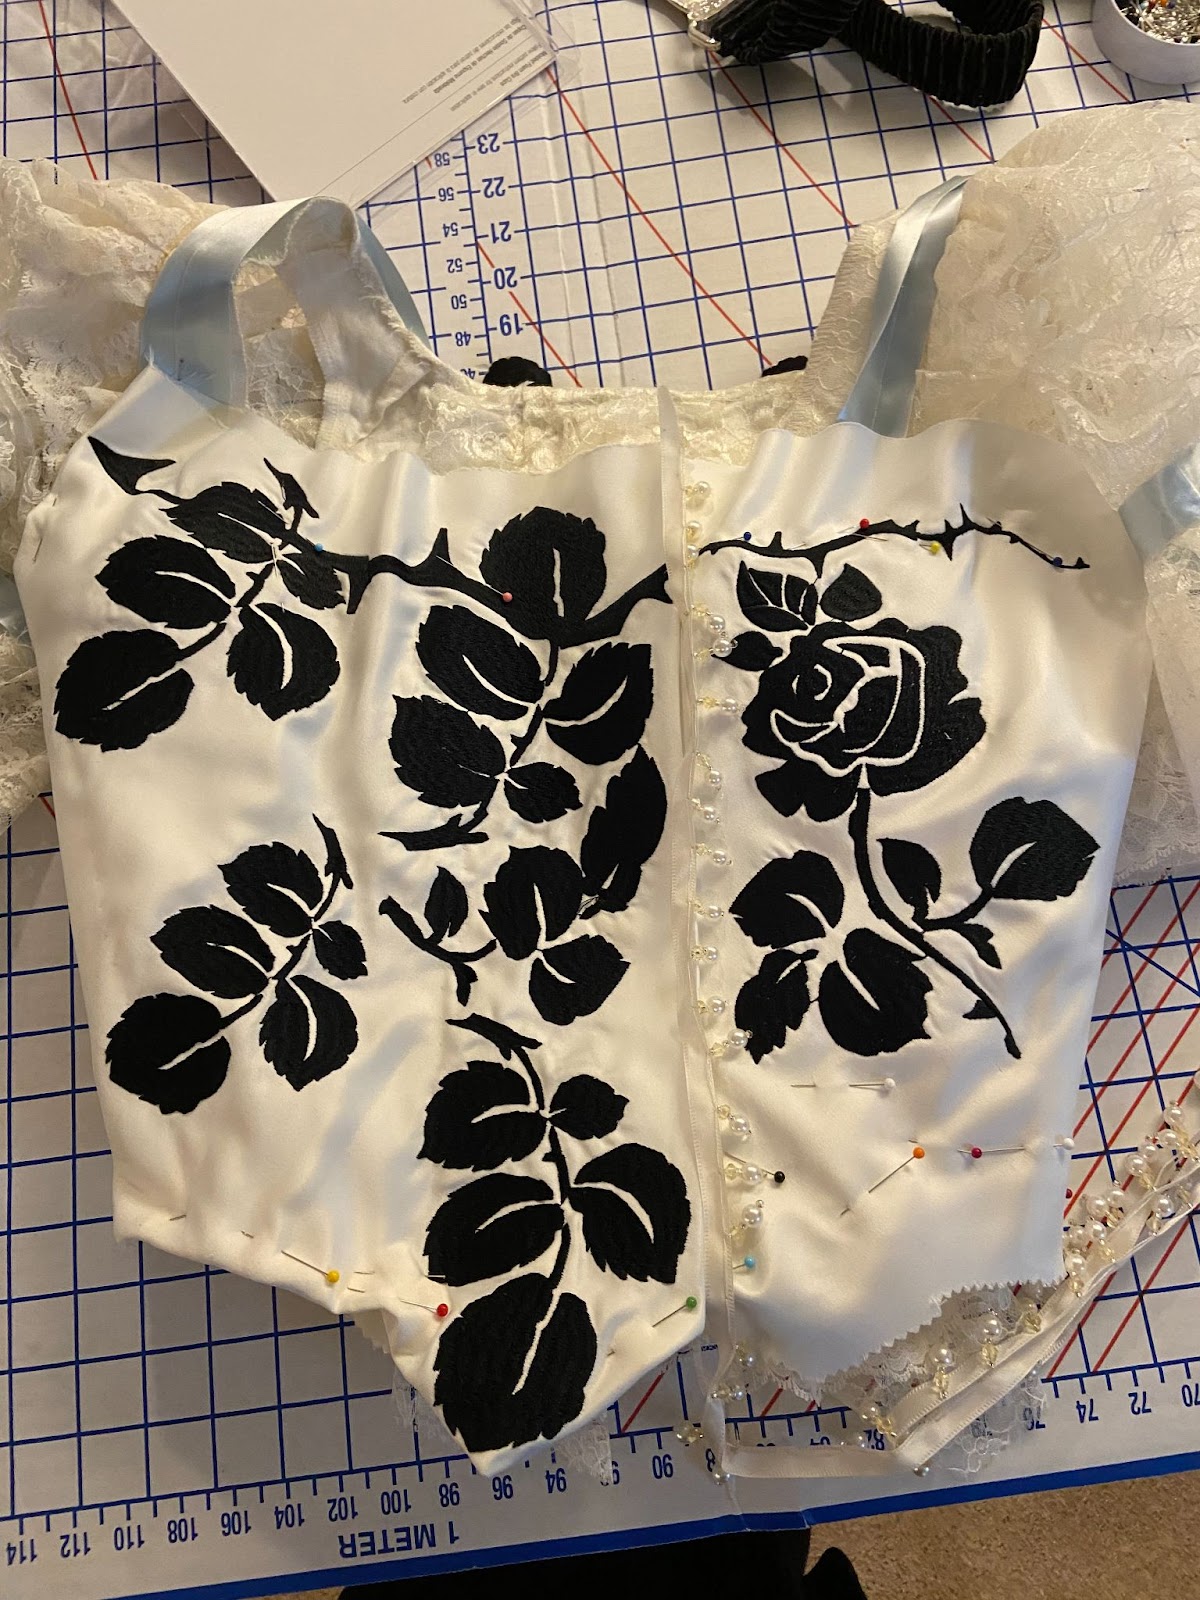
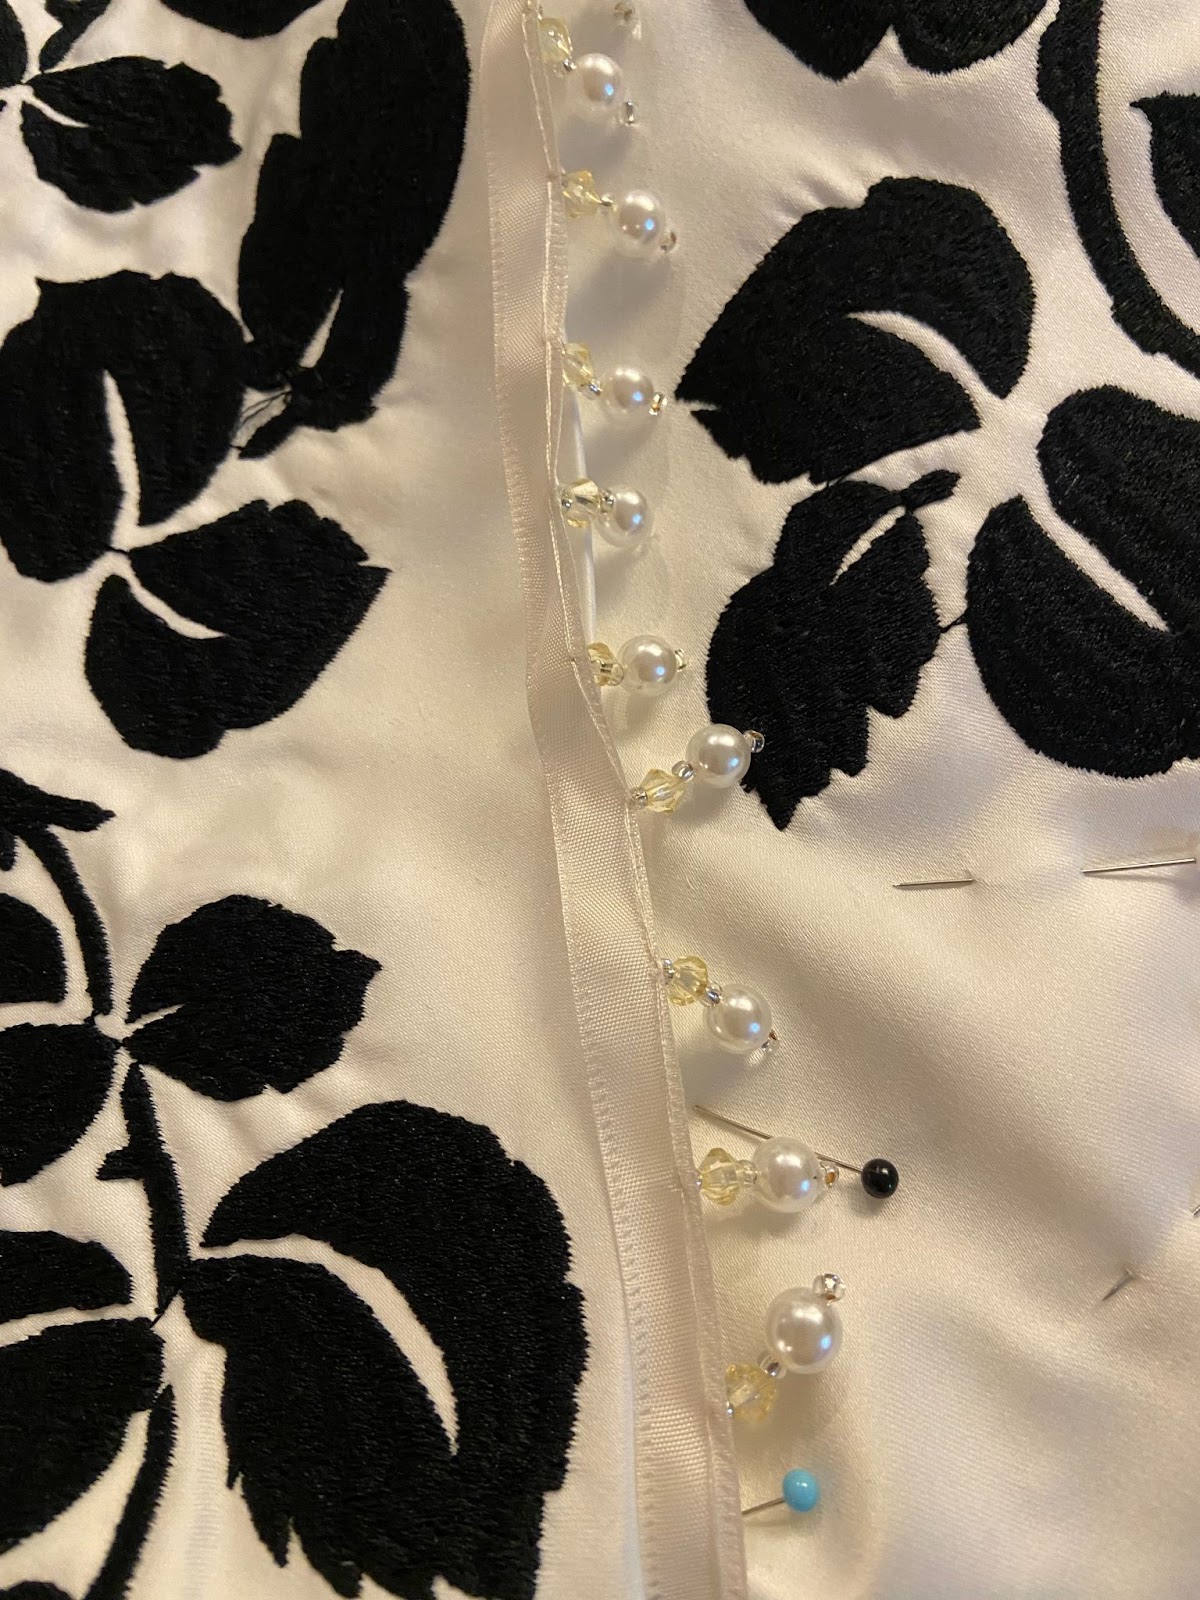
The overlay closes vertically down the left at the bust line with skirt hooks and beaded fringe. This is the third fringe I tried, and far more subtle than the original. I tried 3 different beaded fringe options before I got to this one, and had to make the call that this was close enough. With no photos of the left side of the gown. I snuck a bloom onto the front of the bodice. There are so few roses on the rose gown that I wanted on in the front.
So close to finished! Many, many more motifs were embroidered both onto the satin and onto lace. It started looking so good!
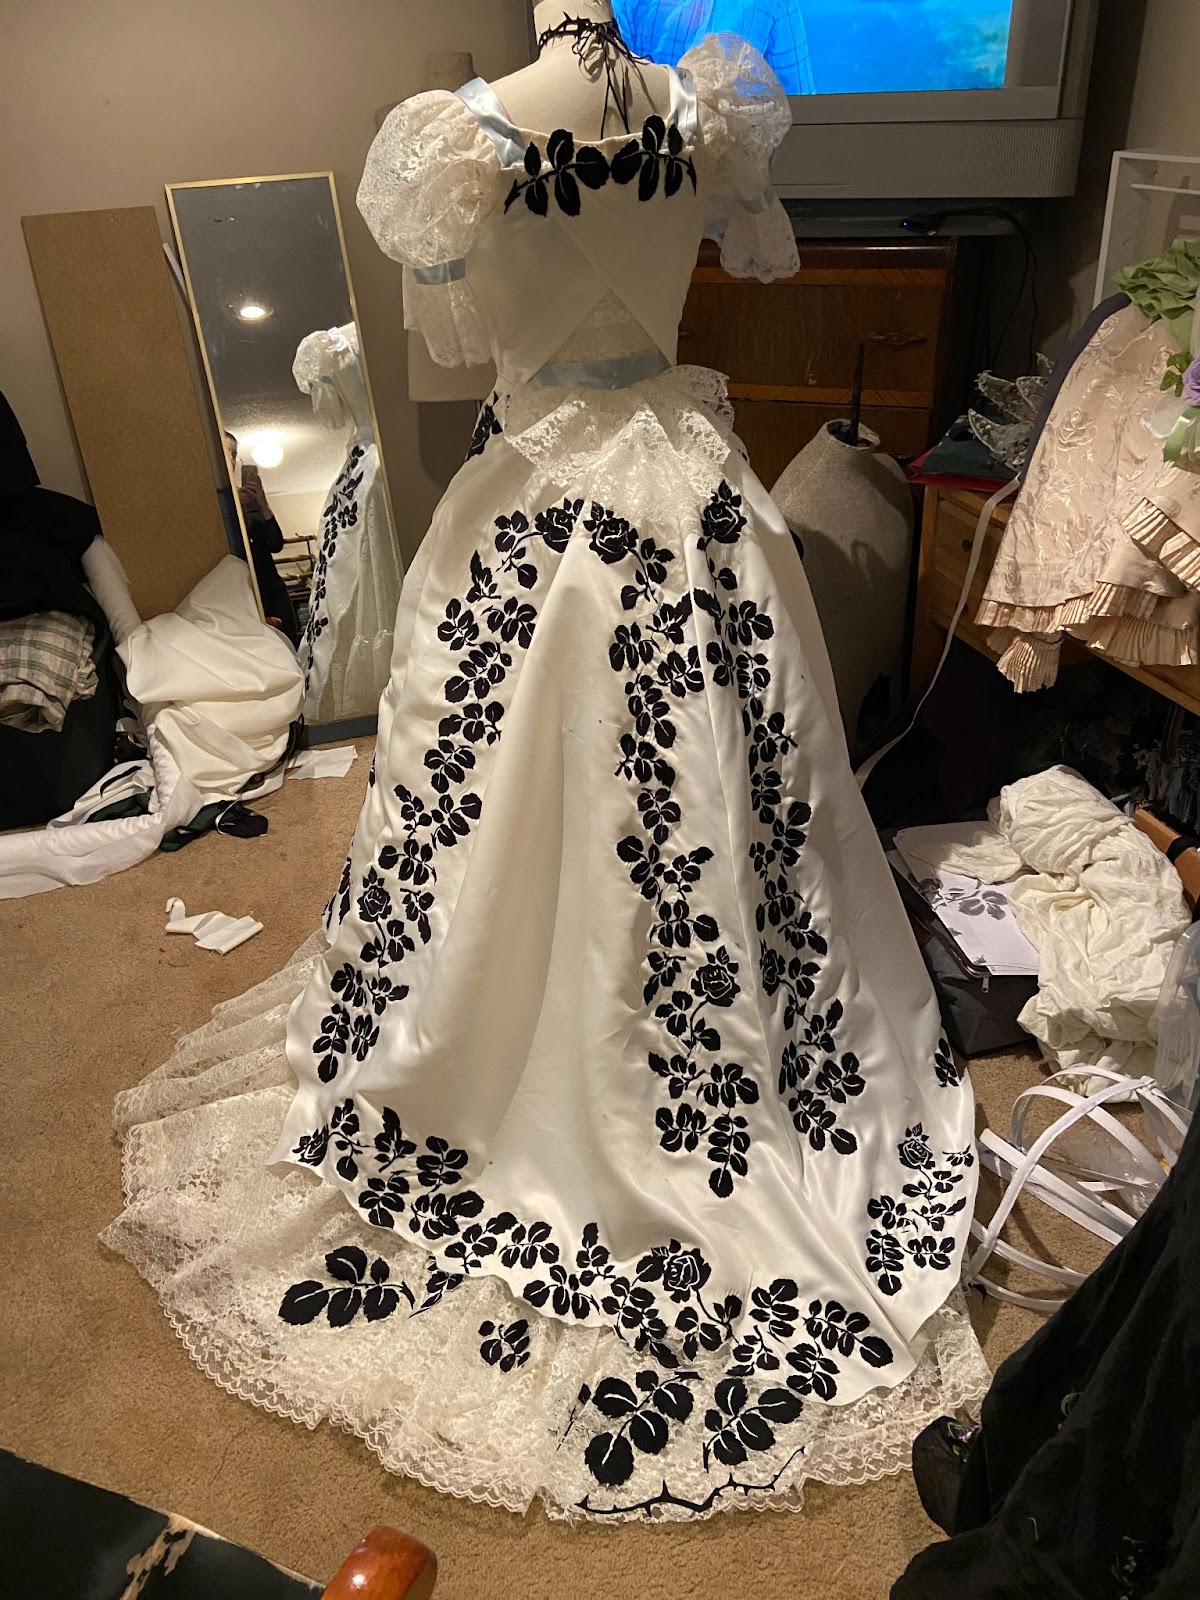
The skirt panels are large and angled at the center back seam, with roses across each of edge. I would need more information to know how the roses were placed when the fabric was woven in order to get it right.
Almost ready and doing hand-sewn seams to try to get the puckering down to a minimum. Note to self, don’t plan another satin gown. Just don’t. Yes, I did have a HUGE pocket at that side seam. The skirt pulls away from the body, and cuts off the motif at the center front. Once I realized that I would need to start the vertical panels yet again in order to replicate the effect, I was out of both time and fabric. Time to finish it.
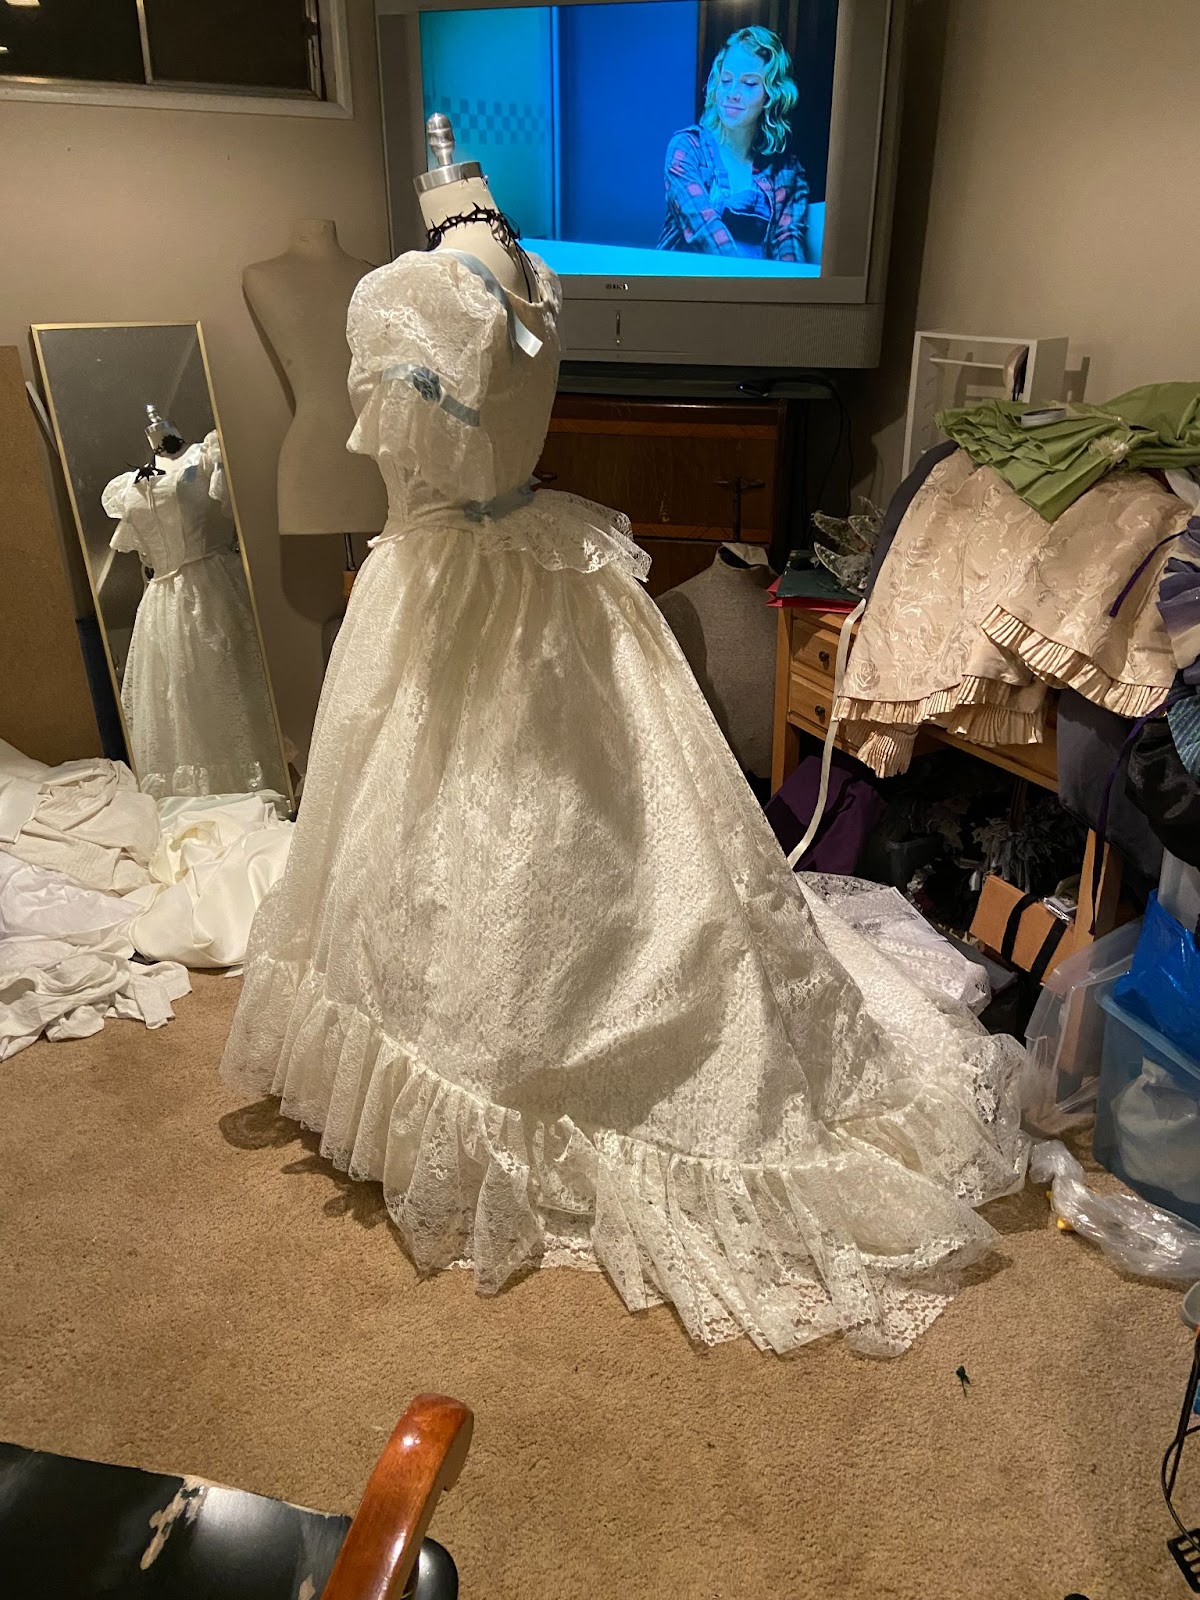
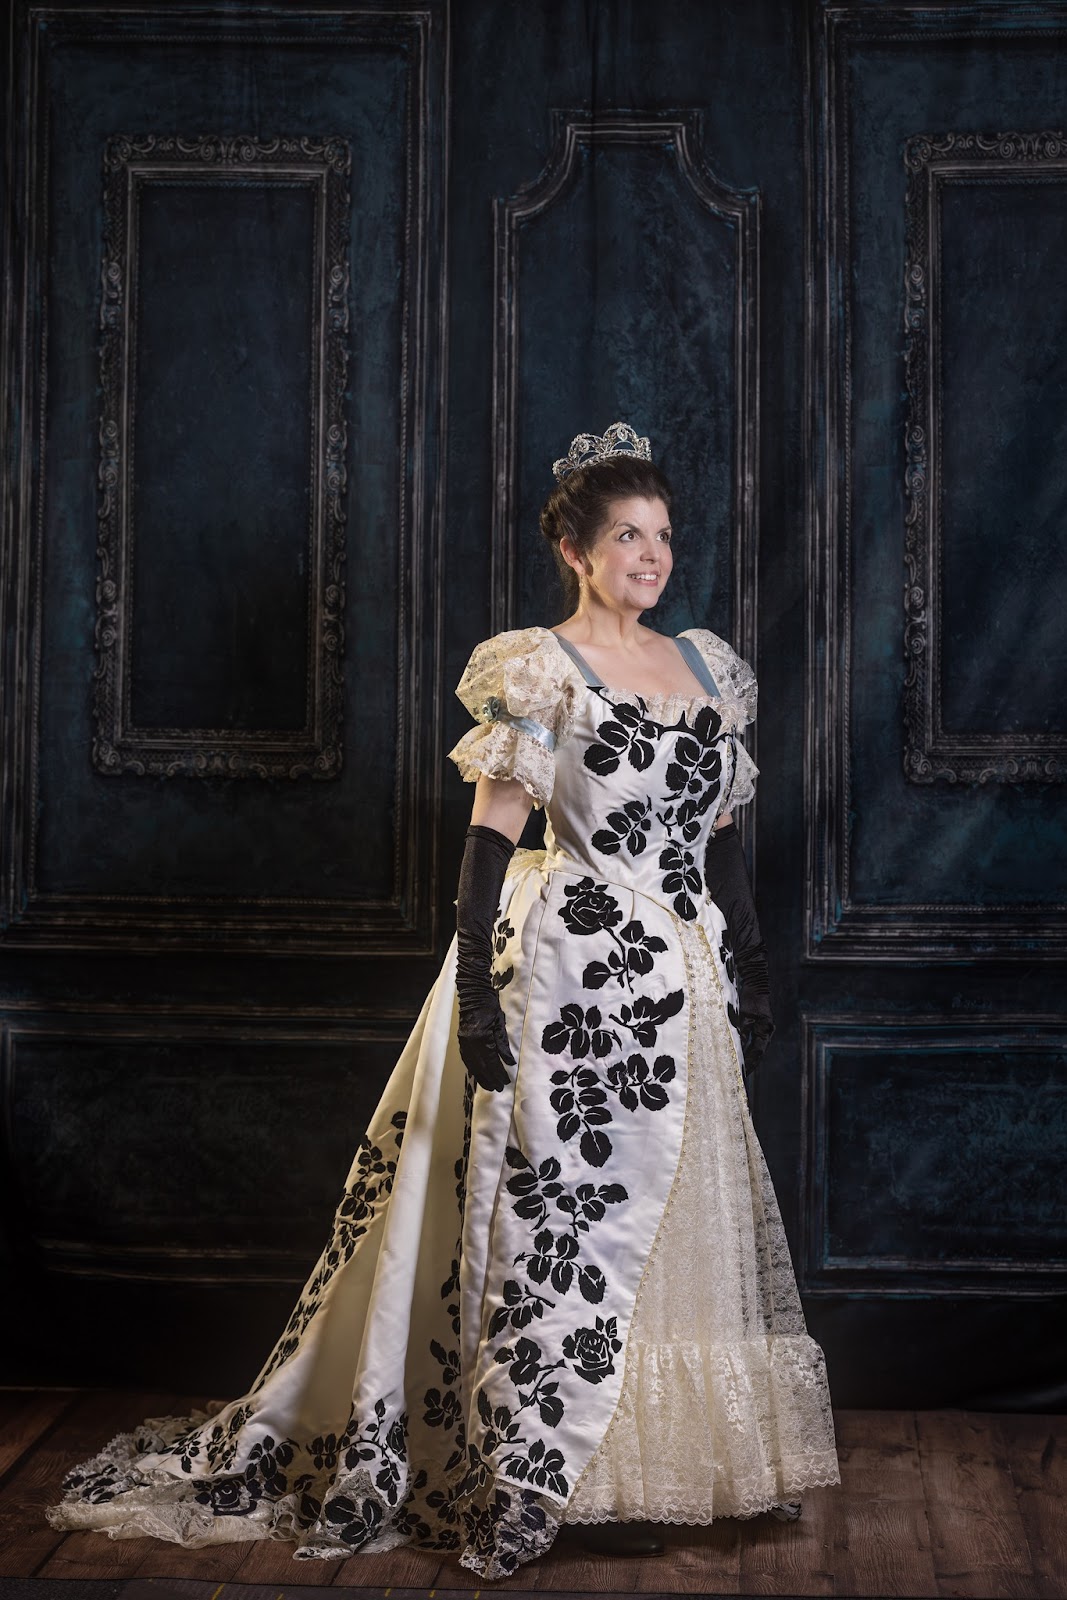
Finished Gown:
Post Script
This project took so long and had so much complexity that I didn’t know if I would be able to complete it for Costume College. I have started and given up on several other big projects over the years, so it was a risk. This one turned out completely imperfectly, but I think the finished results were more than the sum of its parts. If anything, I want to keep striving and keep taking on challenges.
Having worn it and seeing photos, I have a few changes I may make:
- Wider placement on the shoulder straps
- Less poof to the sleeve caps
- Add an additional layer of lace to the underskirt to smooth the line
- Applique motifs over where there are a few unfinished designs
- Redo the entire thing to keep trying to get the puckers out
All in all, I spent 4 months digitizing, embroidering, and making the dress, all long evenings and longer weekends. I’d say hundreds of hours in total. Was it worth it to make a Worth? Absolutely yes!
Millions of Free Traffic with AI Tools – https://ext-opp.com/AIVault
Millions of Free Traffic with AI Tools – https://ext-opp.com/AIVault
Millions of Free Traffic with AI Tools – https://ext-opp.com/AIVault
Millions of Free Traffic with AI Tools – https://ext-opp.com/AIVault
Thanks for the new stuff you have uncovered in your writing. One thing I would really like to touch upon is that FSBO human relationships are built with time. By releasing yourself to the owners the first weekend break their FSBO is actually announced, ahead of masses start off calling on Wednesday, you develop a good association. By sending them methods, educational components, free reports, and forms, you become an ally. Through a personal affinity for them as well as their problem, you create a solid connection that, on most occasions, pays off once the owners decide to go with a realtor they know and trust — preferably you.
Woah! I’m really enjoying the template/theme of this blog. It’s simple, yet effective. A lot of times it’s difficult to get that “perfect balance” between user friendliness and appearance. I must say that you’ve done a great job with this. In addition, the blog loads super quick for me on Safari. Superb Blog!
After Generating Millions Online, I’ve Created A Foolproof Money Making System, & For a Limited Time You Get It For FREE… https://ext-opp.com/RPM
After Generating Millions Online, I’ve Created A Foolproof Money Making System, & For a Limited Time You Get It For FREE… https://ext-opp.com/RPM
ChatGPT powered Autoresponder with Free SMTP at Unbeatable 1-Time Price! https://ext-opp.com/NewsMailer
ChatGPT powered Autoresponder with Free SMTP at Unbeatable 1-Time Price! https://ext-opp.com/NewsMailer
qqetb2
Very efficiently written article. It will be helpful to anybody who usess it, including yours truly :). Keep up the good work – for sure i will check out more posts.
An Ultimate Web-Hosting Solution For Business Owners https://ext-opp.com/HostsMaster
MobiApp AI – True Android & iOS Mobile Apps Builder (Zero Coding Required) https://ext-opp.com/MobiAppAI
MobiApp AI – True Android & iOS Mobile Apps Builder (Zero Coding Required) https://ext-opp.com/MobiAppAI
MobiApp AI – True Android & iOS Mobile Apps Builder (Zero Coding Required) https://ext-opp.com/MobiAppAI
MobiApp AI – True Android & iOS Mobile Apps Builder (Zero Coding Required) https://ext-opp.com/MobiAppAI
MobiApp AI – True Android & iOS Mobile Apps Builder (Zero Coding Required) https://ext-opp.com/MobiAppAI
MobiApp AI – True Android & iOS Mobile Apps Builder (Zero Coding Required) https://ext-opp.com/MobiAppAI
MobiApp AI – True Android & iOS Mobile Apps Builder (Zero Coding Required) https://ext-opp.com/MobiAppAI